 JLG Industries, Inc.
World-leading access equipment manufacturer
____
McConnellsburg, PA
Learn how to install the Delta-Q Battery Charger for your JLG® equipment. For a full demo, please watch the Delta-Q QuiQ programmer how-to video.
Before You Get Started:
(1)
Verify your machine’s compatibility with the Delta-Q Battery Charger before starting any work. (2)
This work should be completed by an experienced JLG® technician with strong computer skills and basic electrical knowledge.
Things you will need before you start:
- A computer with a USB port and CD-ROM drive
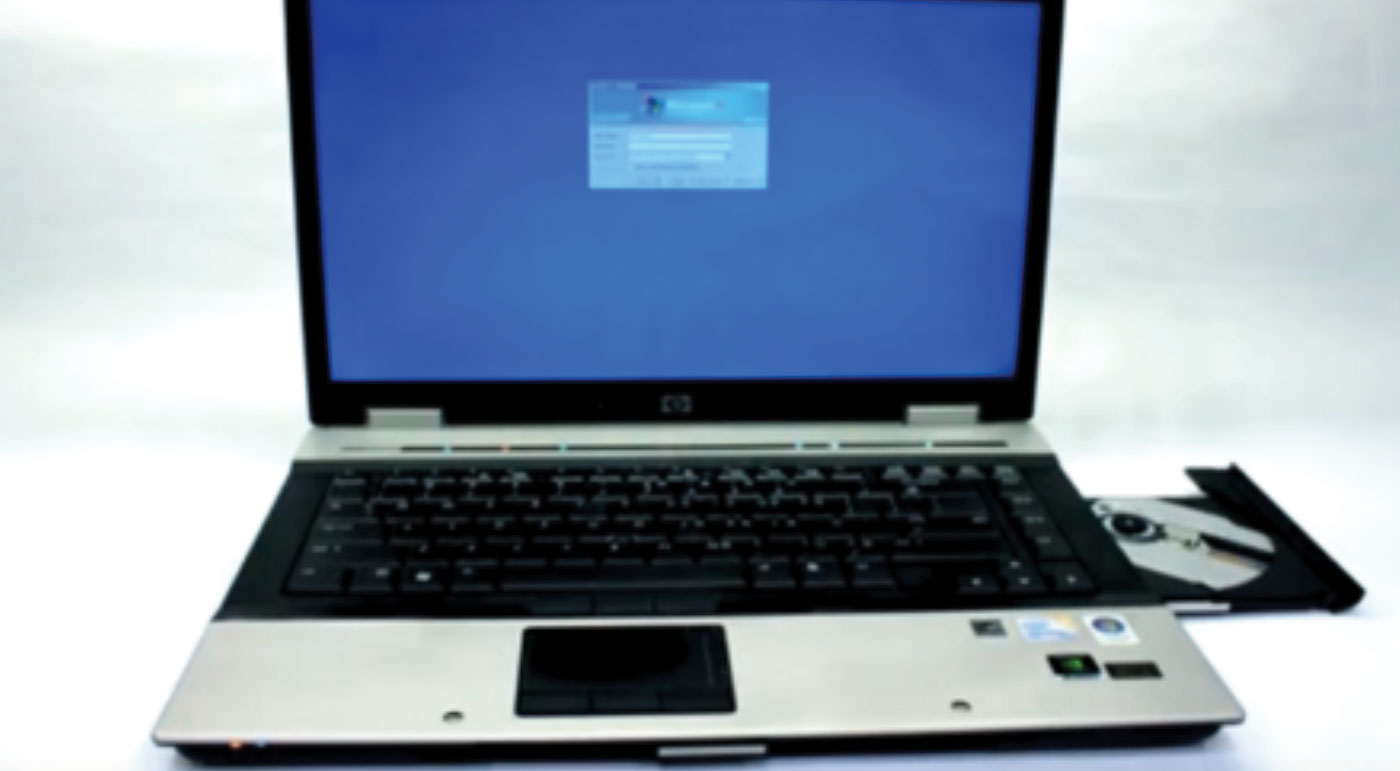
- Windows 97 operating system or newer
- Administrative rights
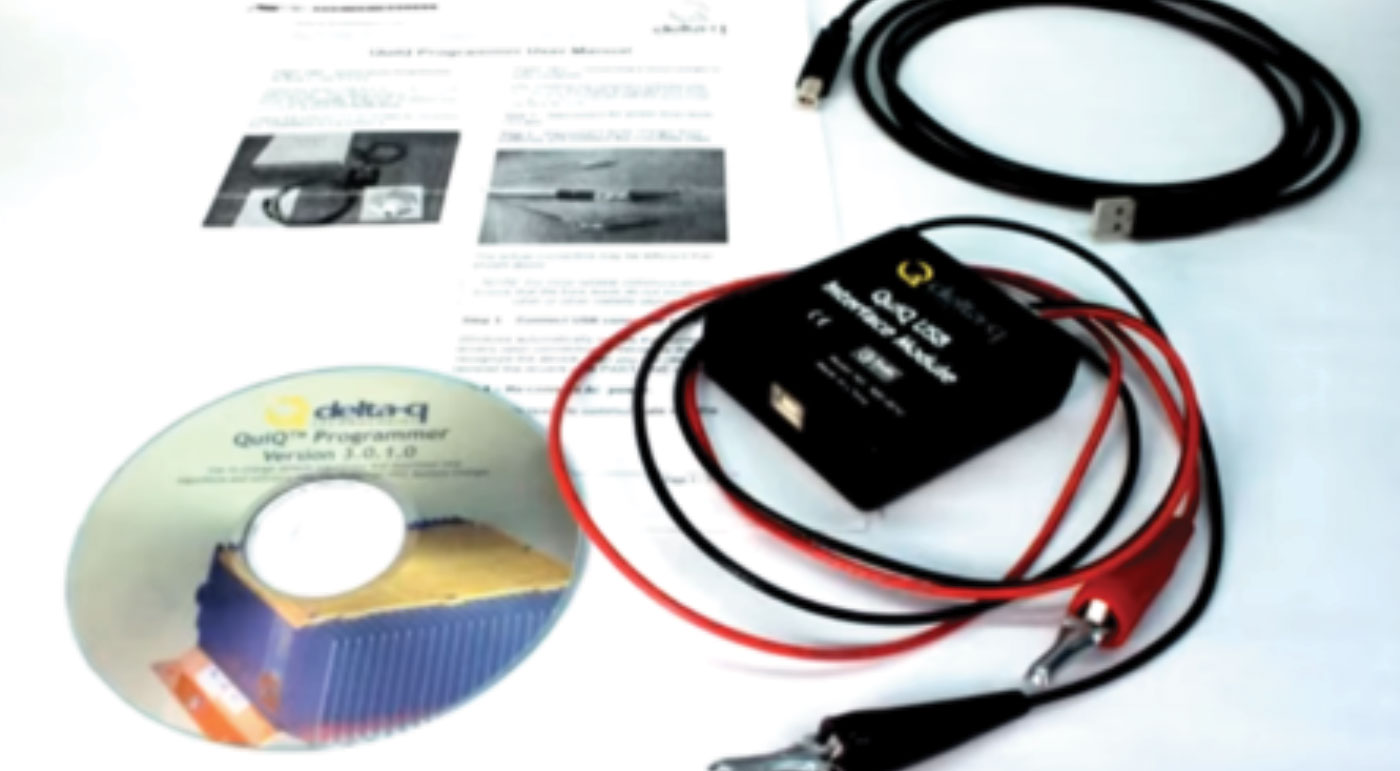
- A Delta-Q kit containing the following items:
- Red and black wire harness with crocodile clips
- The QuiQ USB interface module and USB
- The latest QuiQ programmer installation CD
- The QuiQ programming user instruction manual
Step 1:
Disconnect the AC power from the QuiQ charger.
- NOTE: Ensure your equipment is on a firm, level surface in an area free of overhead and ground-level obstructions with all necessary safety equipment in place.
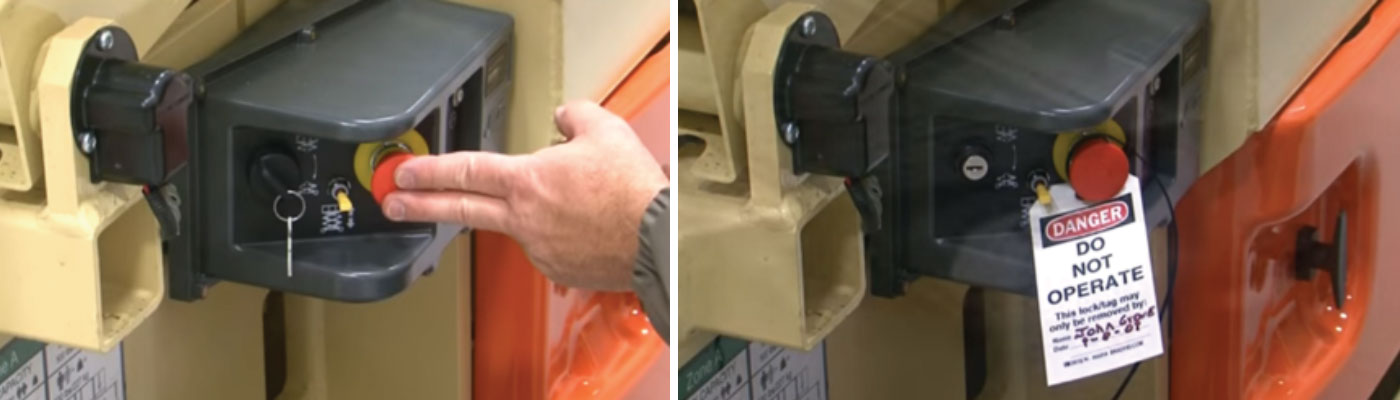
Step 2:
Depress the emergency stop switch on your machine at the ground control station. Turn the key to the “off” position and remove. Place a “Do Not Operate” tag on the unit while completing the installation.
Step 3:
Install the QuiQ programmer software and drivers.
- Insert the installation CD into your computer’s CD-ROM drive. The setup program should start automatically.
- If it does not start automatically, go to the start menu on your computer and click “Run.” Type this: E:\setup.exe. Click OK.

- Follow the instructions on your screen to complete the installation.
After installing the software, you are ready to connect your QuiQ charger to the computer with the QuiQ USB interface module.
Step 4:
Unplug the main battery disconnect.
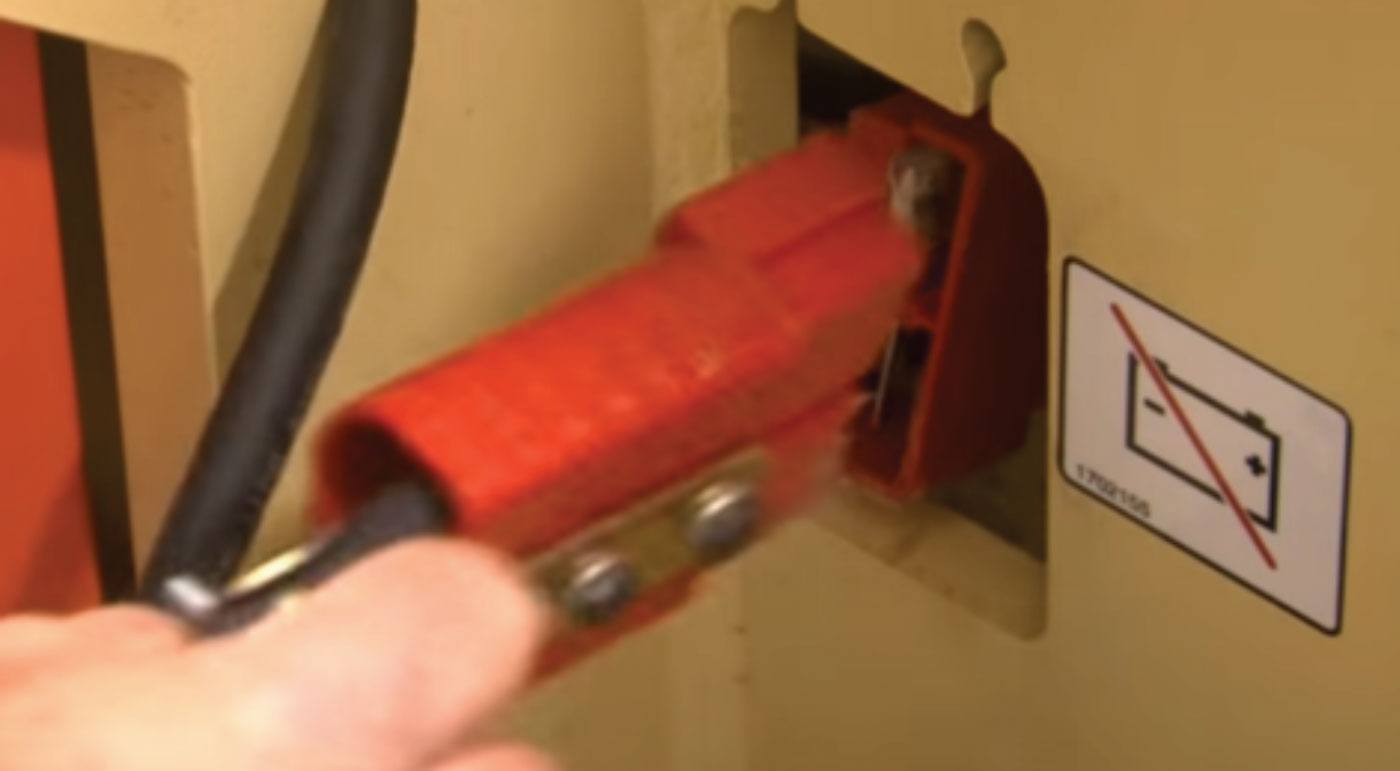
Step 5:
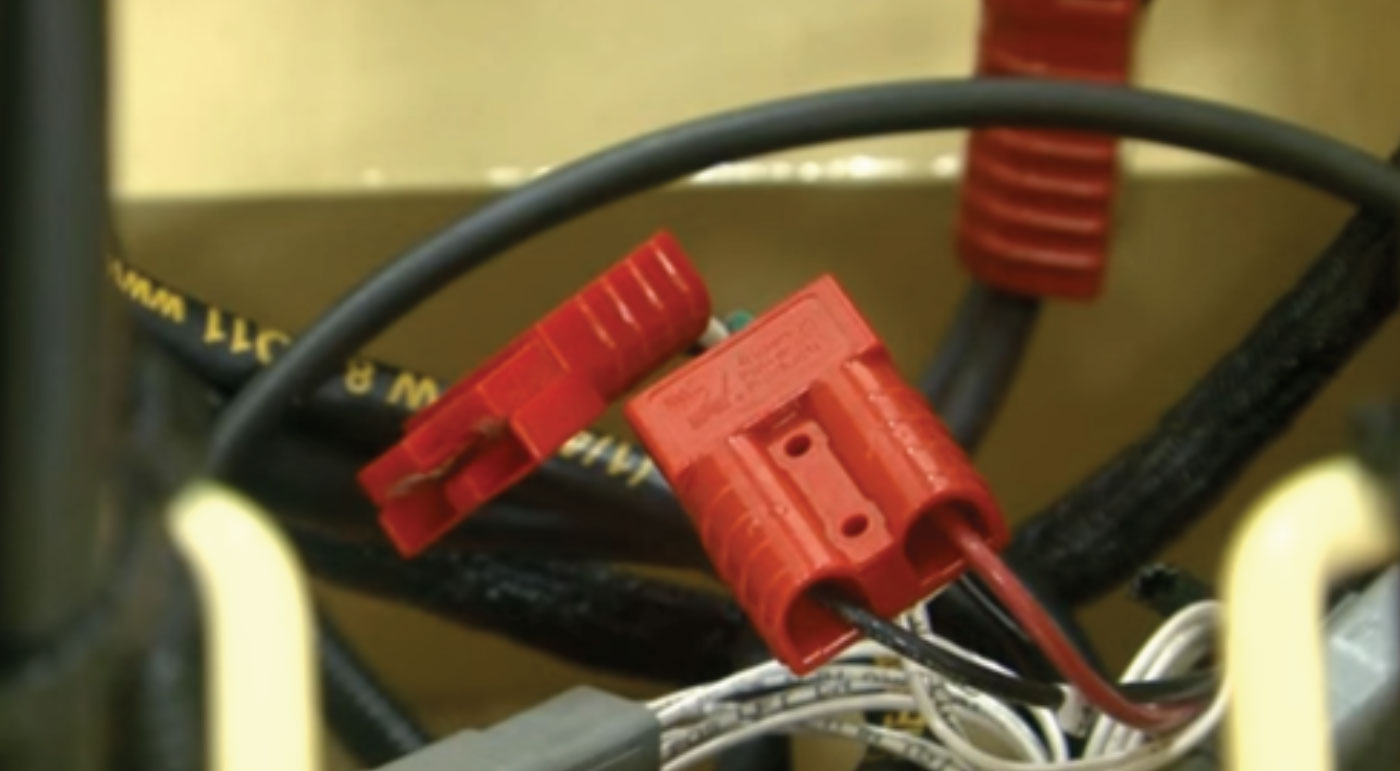
Disconnect the charge to the machine’s power via the Anderson plug.
Step 6:
Connect the crocodile clips to the harness.
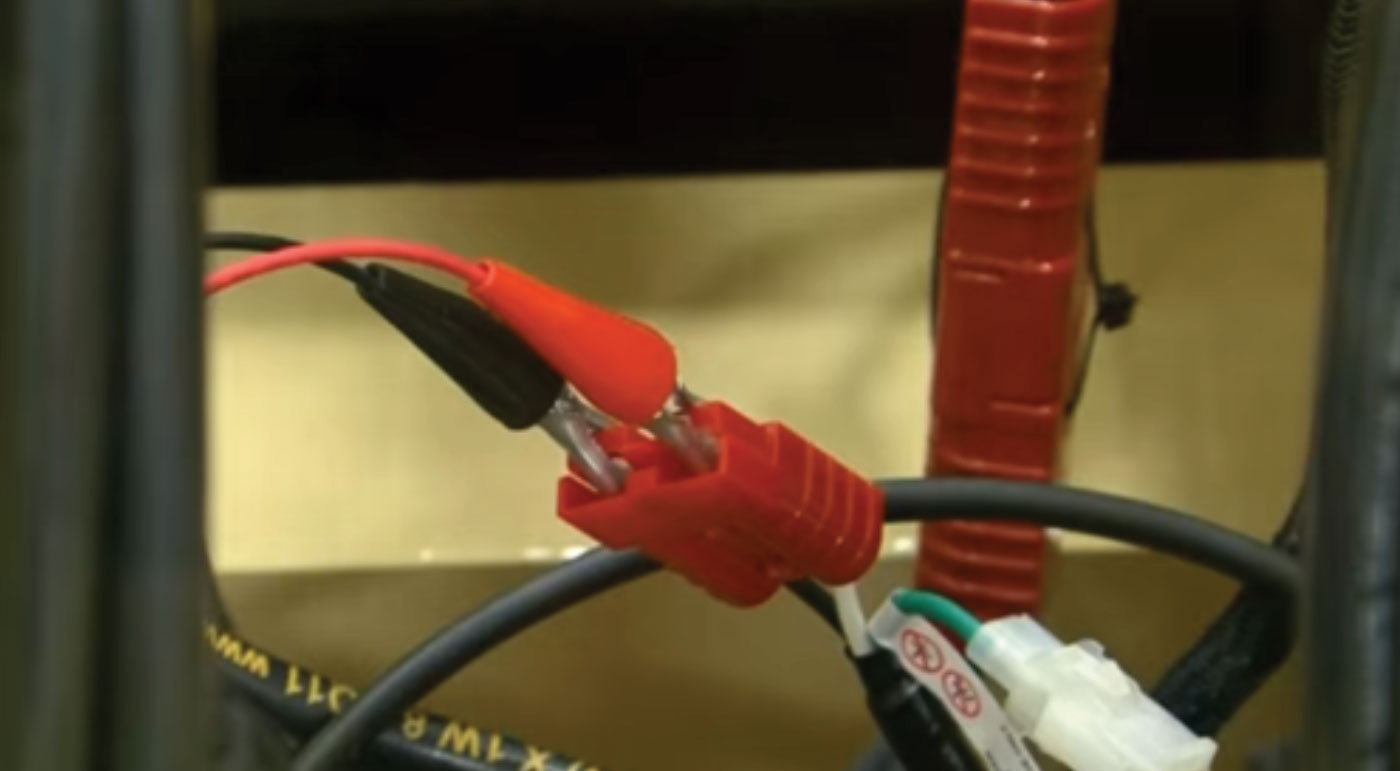
- NOTE: To ensure the most reliable communications, the bare leads should not touch each other or any other metal objects.
Step 7:
Connect the USB connector to your computer. Windows should automatically install the correct drivers upon connection.
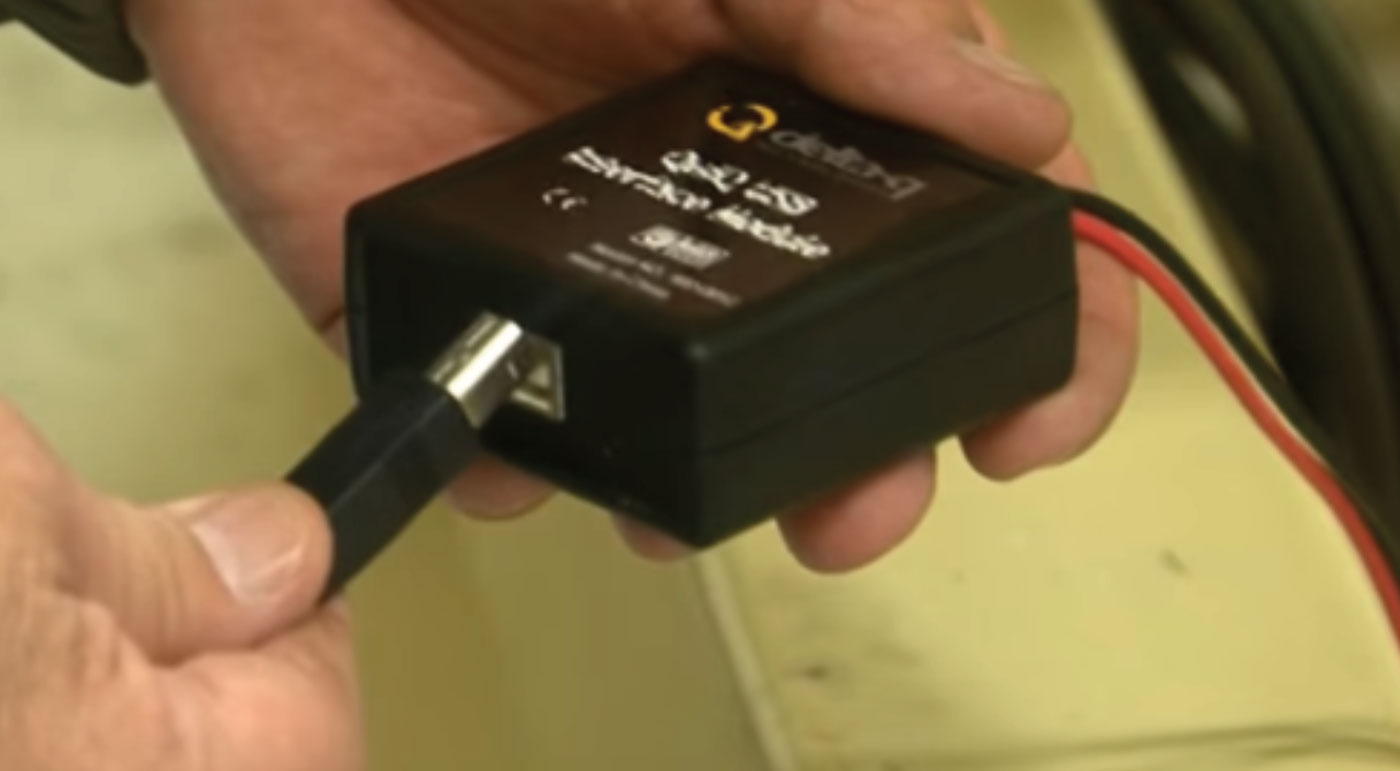
- NOTE: If Windows does not recognize the device, you will need to reinstall the drivers provided with the USB connector.
Step 8:
Reconnect the AC power. You are now ready to communicate with the QuiQ charger.
Step 9:
To launch the QuiQ programmer, go to the Windows start menu. Hold your cursor over “Programs.” Find the QuiQ programmer folder and select the QuiQ programmer item. When the dialogue box appears, select the correct port to use and click “OK.
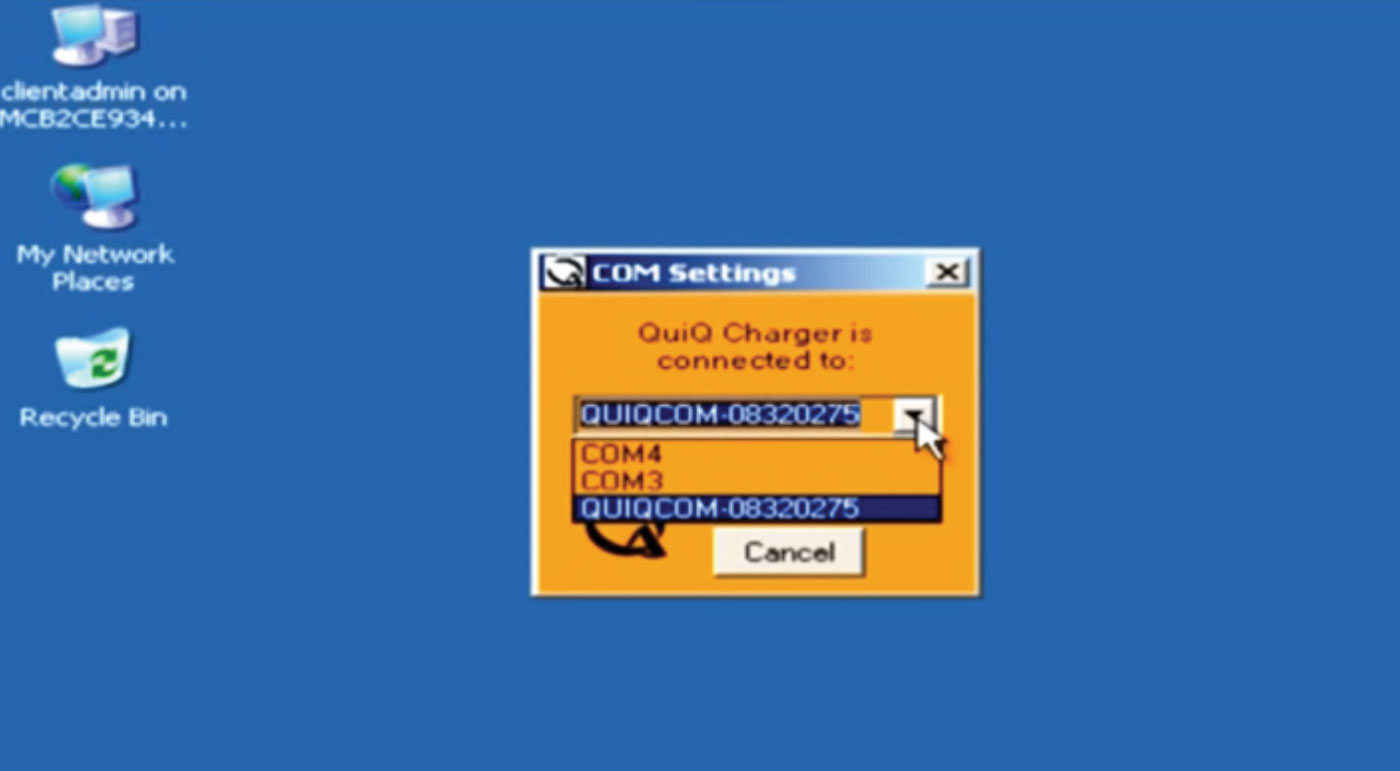
- NOTE: The latest version of QuiQ USB interface module is listed as the “QUIQCOM” device. Older versions will be listed as “COM” and will still be detected by Windows automatically.
Step 10:
Check the status of the charger. If you see your charger’s serial number listed on your computer screen, then you know you are properly connected.
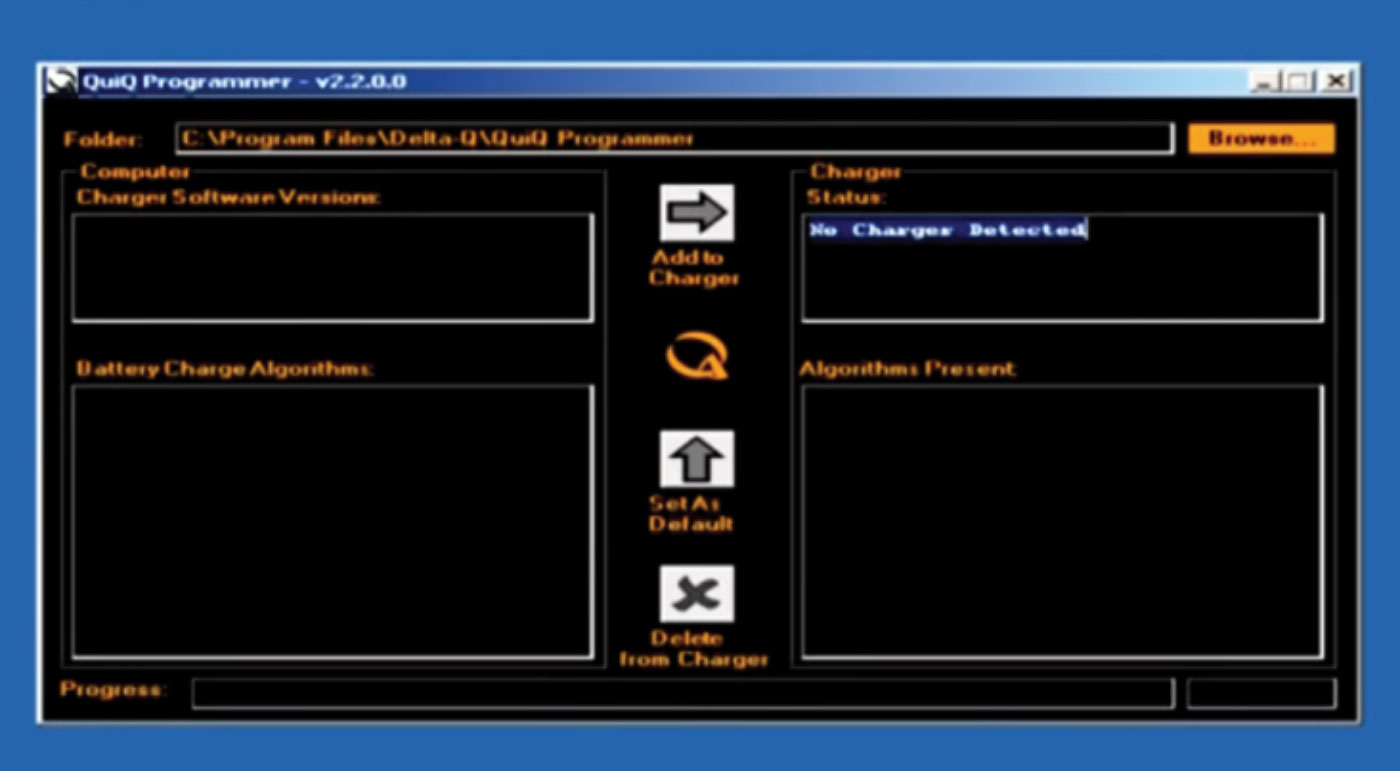
- NOTE: If your screen has the message “NO CHARGER DETECTED,” this means the program is unable to communicate with your charger. You will need to establish a connection before proceeding.
If your charger isn’t being detected, please check the following:
- Ensure the charger is properly connected to the computer. Check that all wires are connected and not touching each other or any other metal.
- Ensure you selected the right communication device. Close the QuiQ programmer. When you reopen it, try selecting a different communication device than before.
- Ensure the charger has AC power. Double-check the connection to the AC power.
- Ensure the QuiQ USB interface driver was installed correctly. Reinstall the driver.
If your message still says, “NO CHARGER DETECTED,” contact Delta-Q for troubleshooting help. After properly connecting the charger, you can now edit the charger settings.
Step 11:
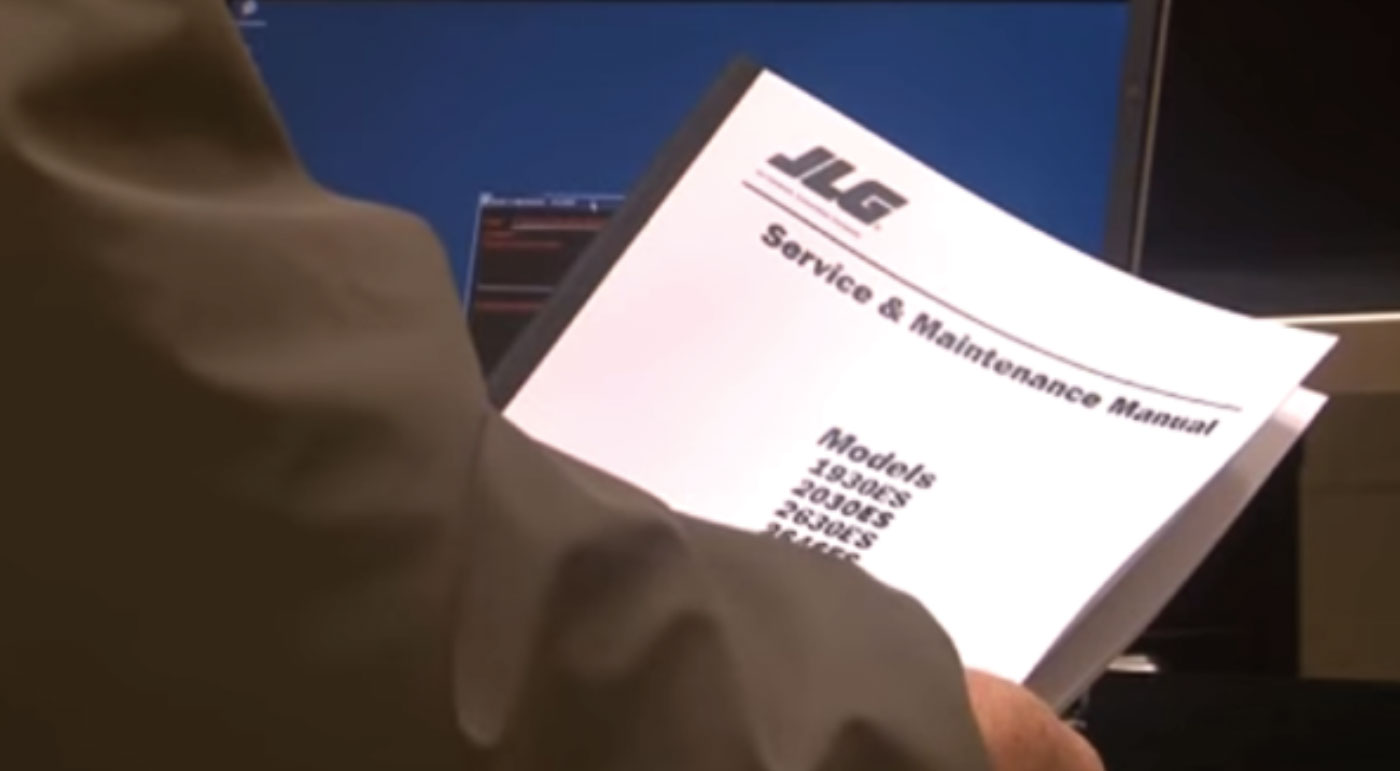
It’s time to select an algorithm. To know which algorithm to use, refer to your machine’s service and maintenance manual for a listing of algorithms.
Listed in the bottom-right section of your computer screen is a list of algorithms currently present on the charger. If the desired algorithm appears in this list, select it, then click the green “up” arrow for “Set As Default.” This will set the algorithm you selected as your new default.
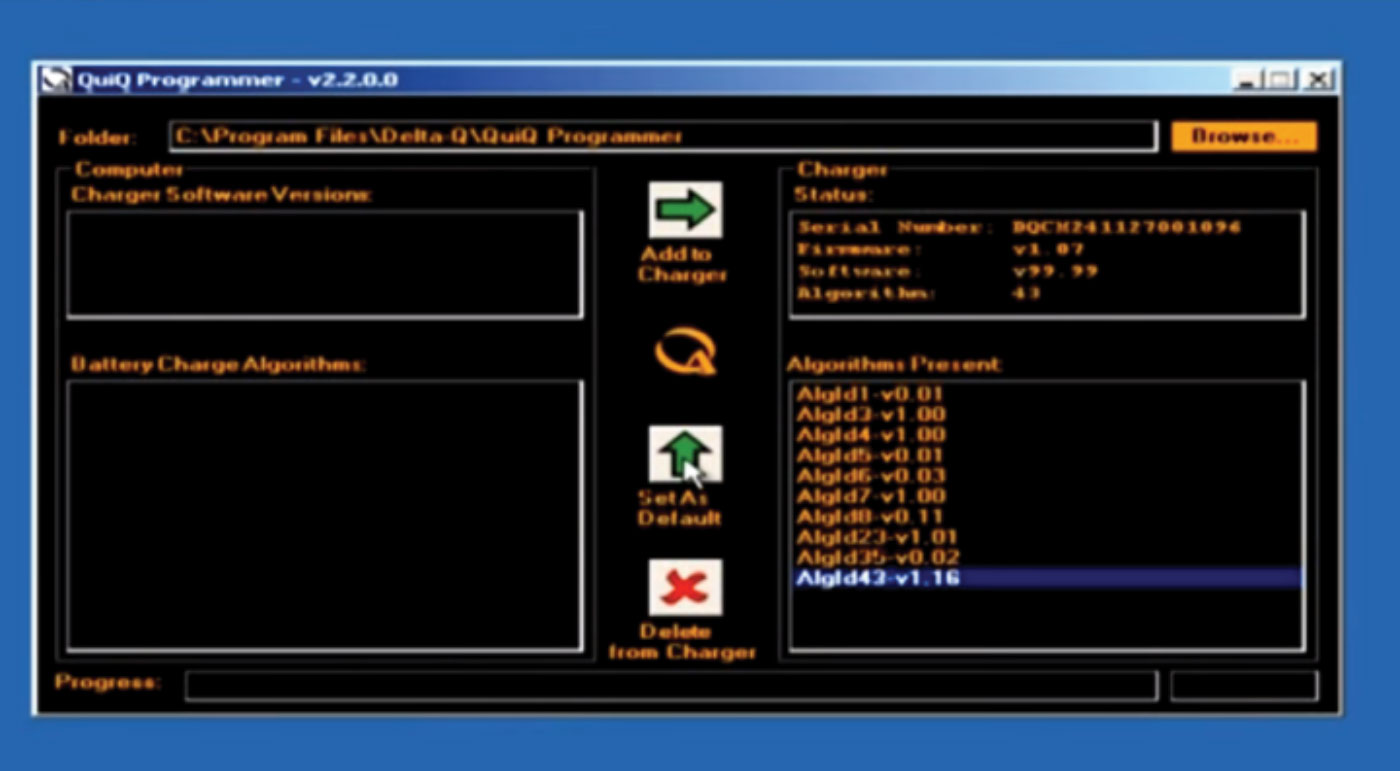
- NOTE: If your desired algorithm is not listed, you will need to add it manually. It is highly recommended that you save the algorithm file to your computer first. Each charger holds a maximum of 10 algorithms. In some cases, you may need to delete one algorithm before being able to add another.
Delete an algorithm: Select the desired file to delete, then click on the red “x.” The file is now deleted.
Add a new algorithm: Click the orange “Browse” button in the upper-right corner of your screen. Select the file you want to add from your computer. It should now be listed under “Battery Charge Algorithms” on the left side of your screen. Select the desired algorithm, then click the top, right-facing, green arrow to add it to the charger. Next, select the algorithm in the “Algorithms Present” box and “Set As Default.” Verify you have the desired algorithm on the charger before closing the program.
Step 12:
Disconnect the AC power from the QuiQ charger. Then, disconnect the USB cable. Disconnect the crocodile clips and reconnect the charger to the machine’s power via the Anderson plug.
Step 13:
Reconnect the main battery disconnect.
Step 14:
Reconnect the AC power.
Step 15:
Verify the charger is set up properly. Run it through a complete charge cycle.
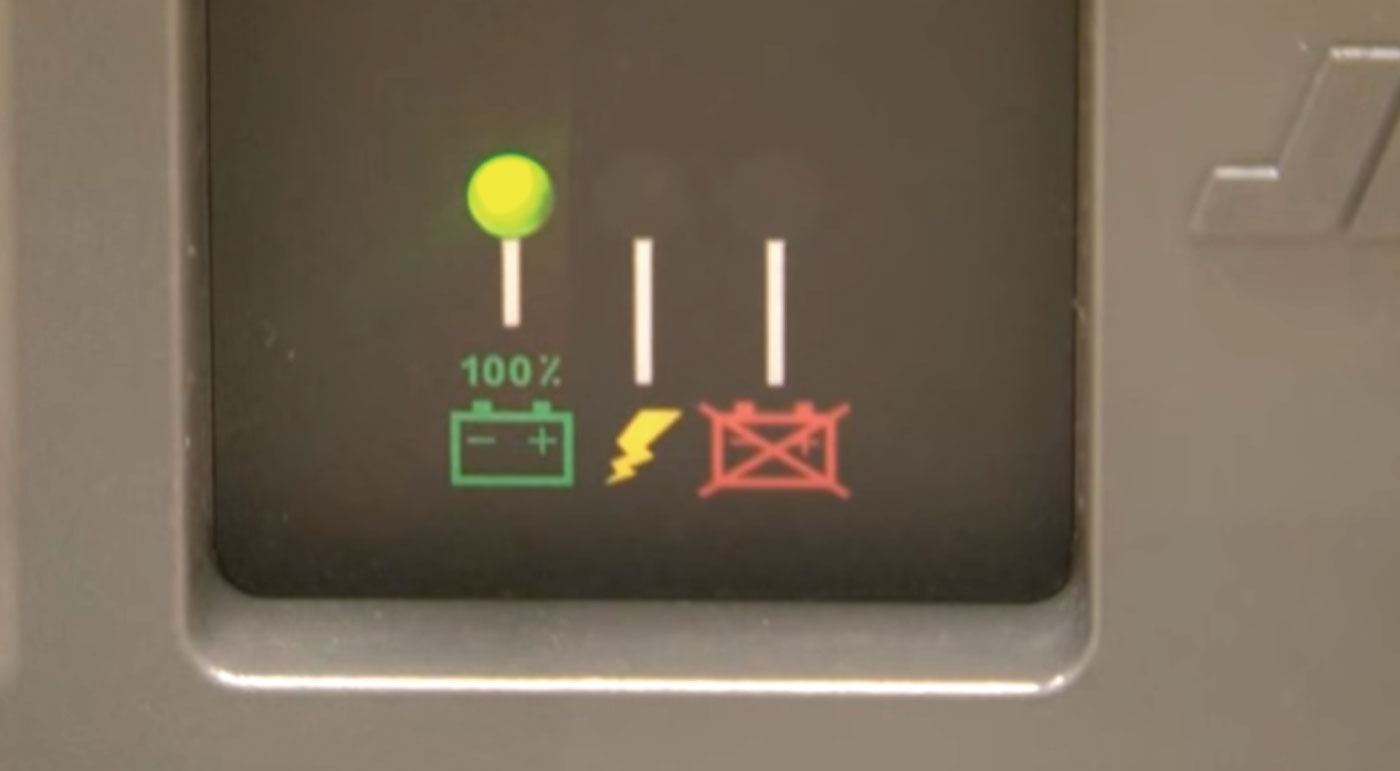
- NOTE: The light must turn from yellow to solid green (as pictured), with no fault codes present. If the light does not change, or a fault code is present, contact a JLG® service representative.
Your charger is now programmed and ready to use.